第一章 LaTex与VScode的相遇
第一章 LaTex与VScode的相遇
Penry0 小工具推荐
-
录制
.gif文件的工具:- 下载链接:screentogif
- 官方文档:how to use screentogif
-
LaTex中表格渲染工具:- 使用链接:tablesgenerator
-
自制的
北京理工大学课程报告LaTex模版:- 分享链接:BIT Course Report
1 在VScode中配置LaTex编译环境
想在本地高效使用 LaTeX 编辑学术论文、课程报告、技术文档?试试 VS Code 吧!这部分将一步步教你配置一套 支持中文、BibLaTeX、Biber、图表绘制、代码高亮等功能 的 VS Code + LaTeX 环境。
适合系统:Windows / macOS / Linux
适合用户:对 Overleaf 不够自由、想自定义样式或离线编译的朋友
1.1 安装必备组件
1.1.1 安装 Tex 套件
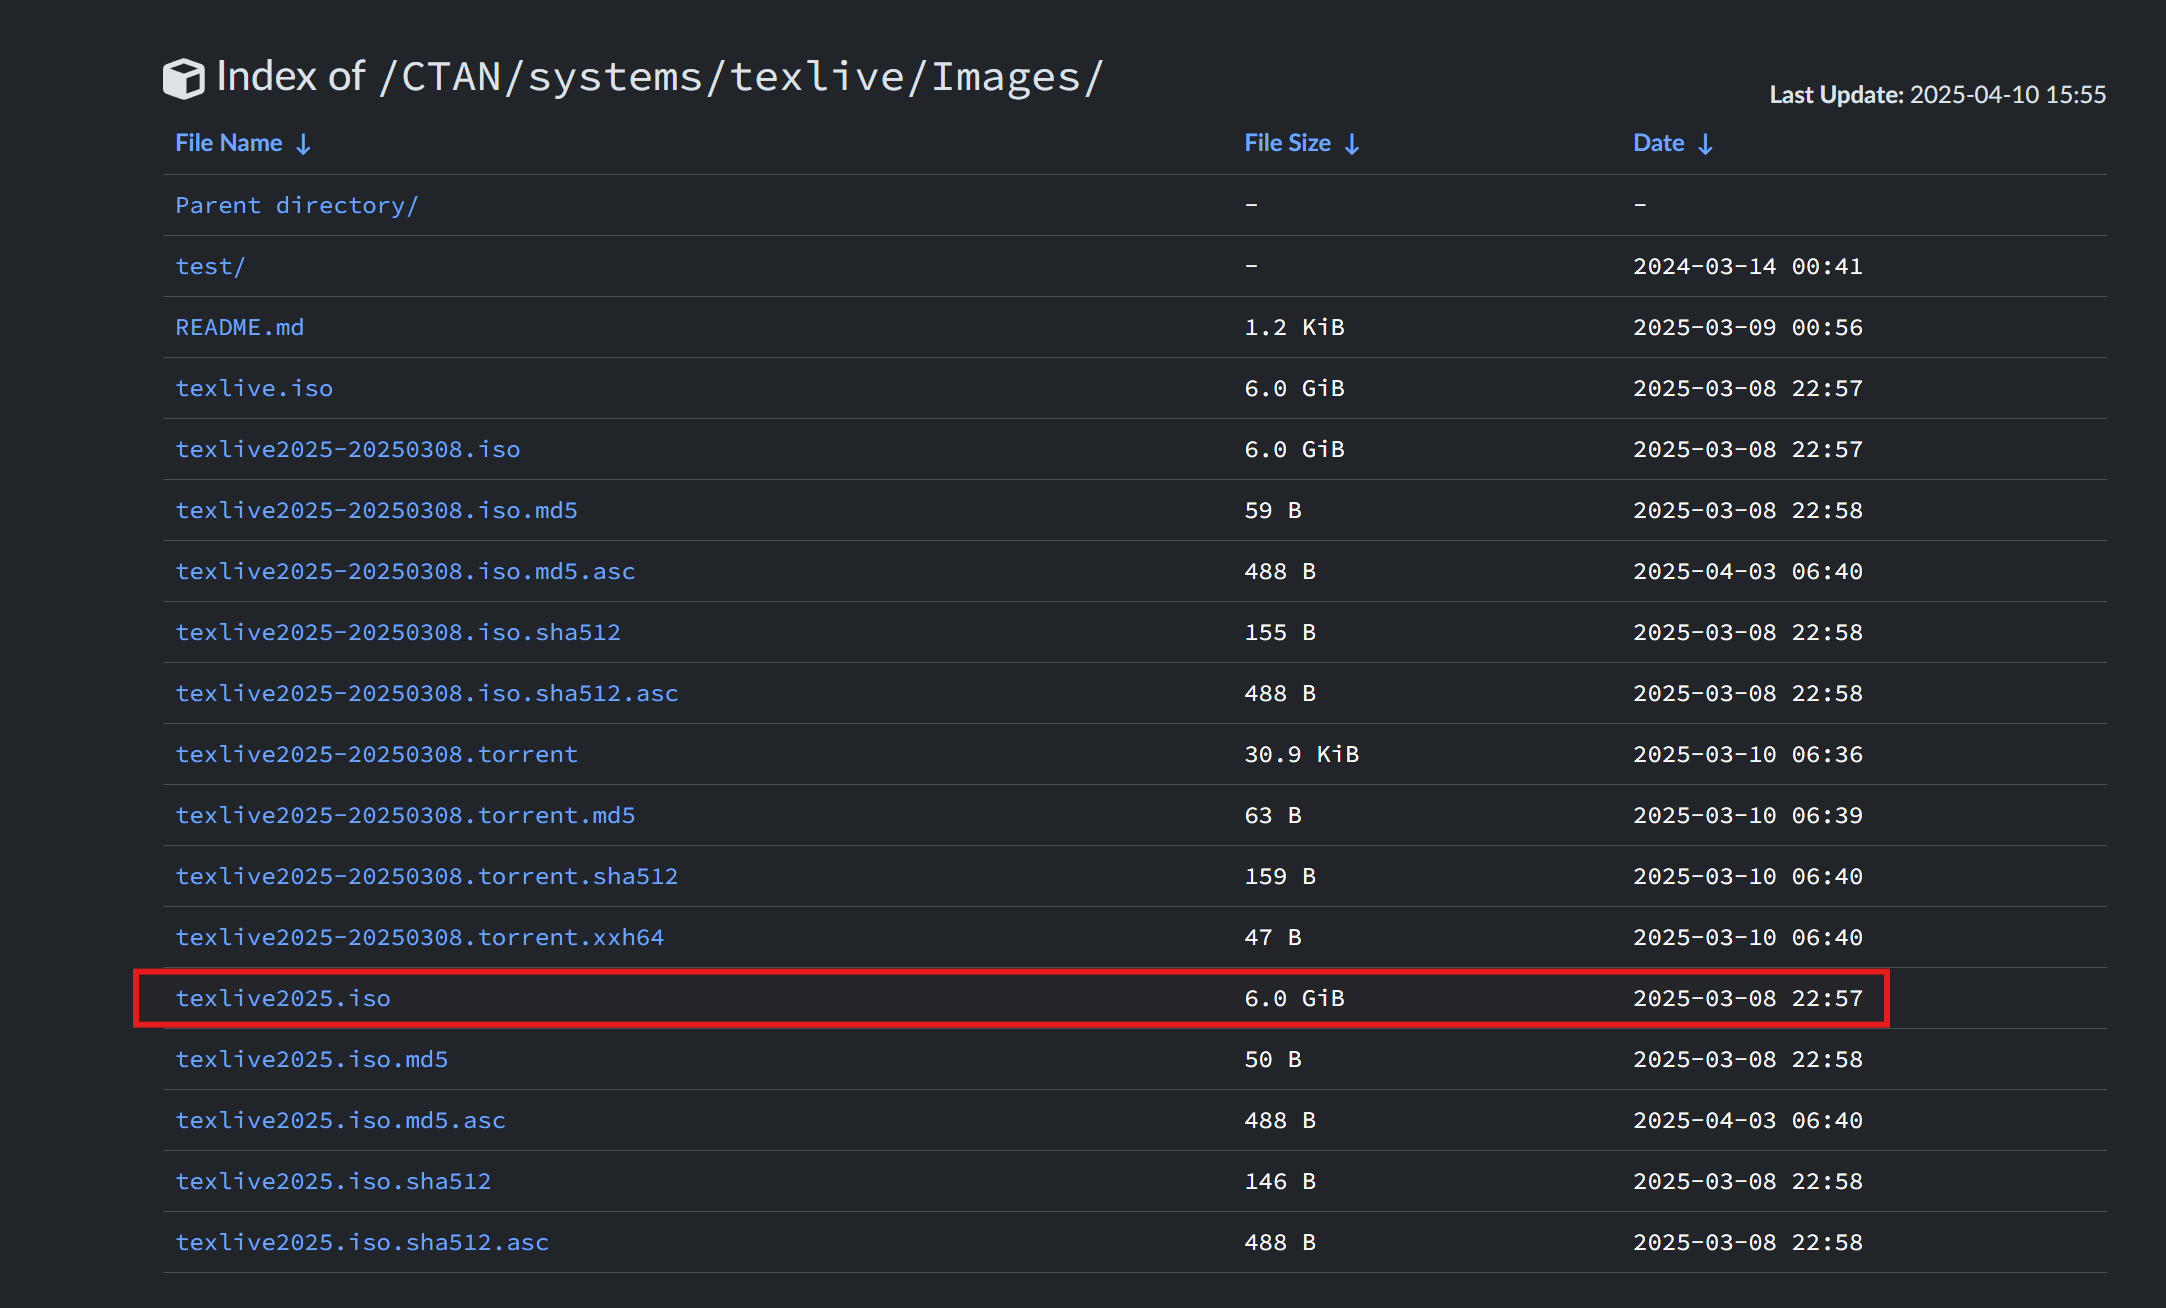
- 官网:https://tug.org/texlive/
- 推荐安装完整版(约 6GB),支持所有宏包和字体。
📦 Windows 用户建议使用 TeX Live 镜像站 下载安装更快。
- 打开安装包,选择文件
install-tl-windows,以管理员身份运行,进行安装,安装过程比较缓慢,大约几十分钟,请耐心等待。 - 安装完毕后,
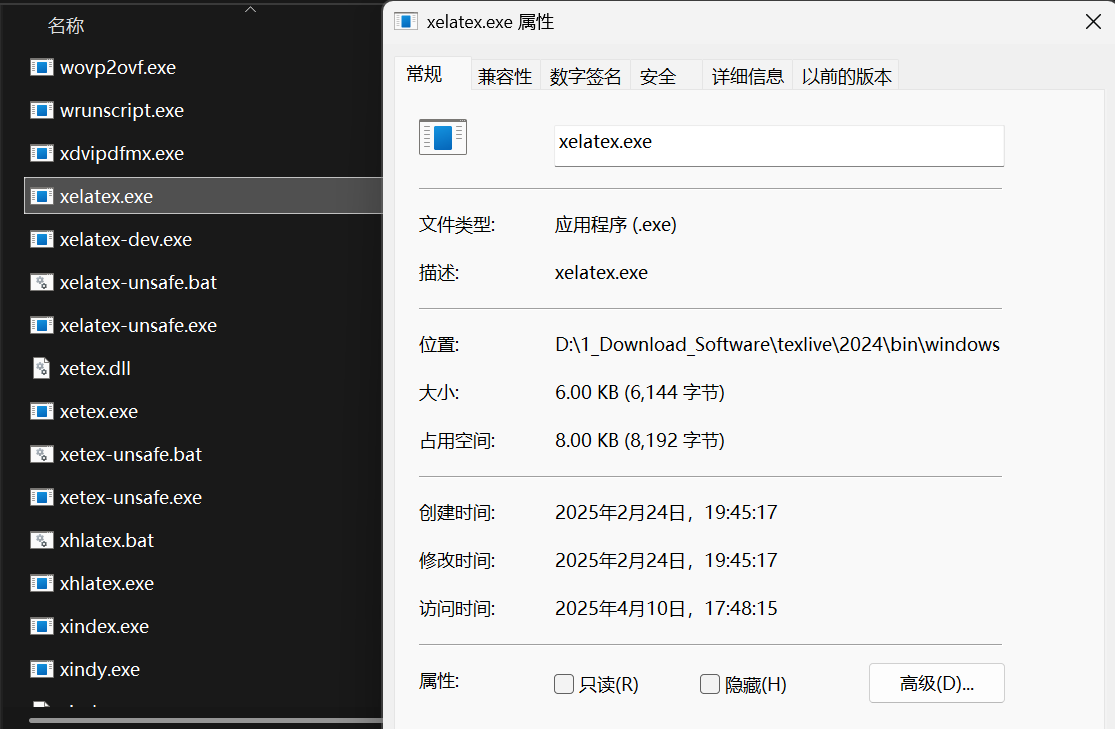
Win+R打开并输入cmd,运行终端,在终端输入xelatex -v验证是否安装成功,如果出现如下图所示版本号,便安装成功,笔者安装的是Tex Live 2024:

此步也可能出现
xelatex不是内部命令也不是可运行的程序,但是不用担心,这只是 Tex Live 的软件路径没有添加到系统环境变量中,并无太大影响。实在觉得不放心,可以按照以下步骤添加环境变量。
1.1.2 配置 Tex 套件环境变量
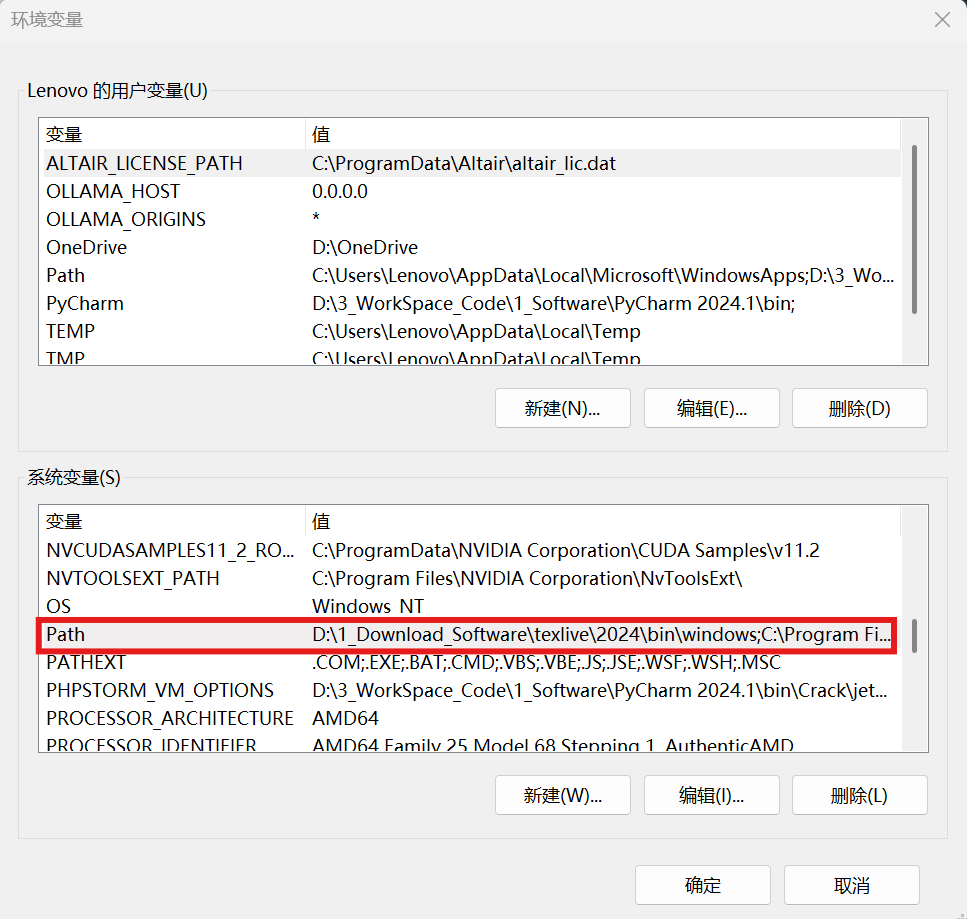
Win+R打开并输入sysdm.cpl,进入到系统属性页面,然后选择高级环境变量打开如下页面:
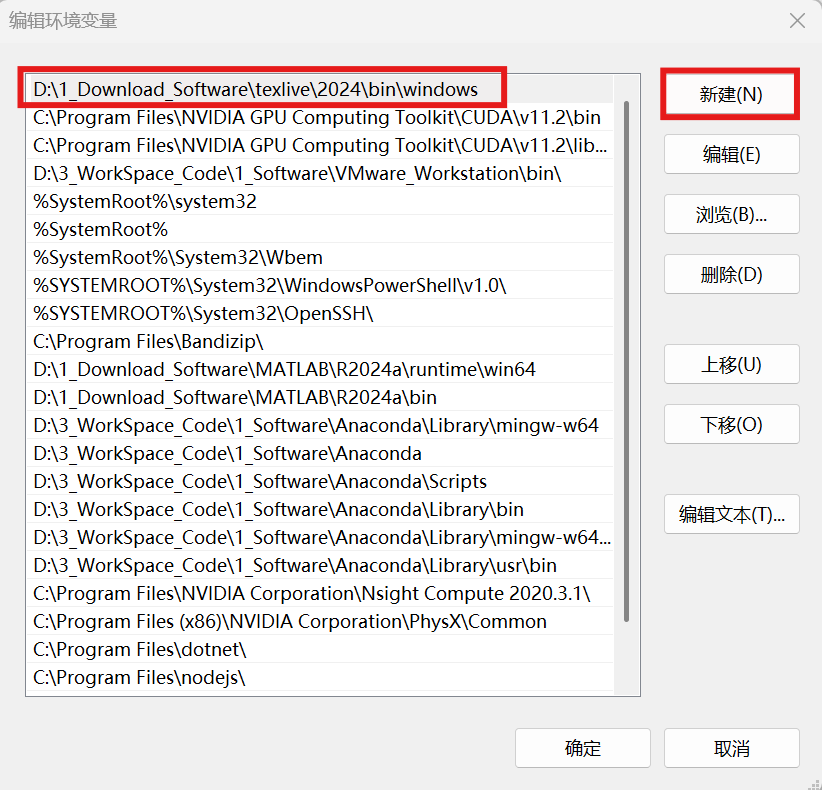
- 双击系统变量中的
Path,打开后,选择新建,将xelatex.exe所在路径复制过来,然后点击确定即可,一般来说xelatex.exe的安装路径在\texlive\2024\bin\windows文件夹里面:

| 环境变量 | Path | 安装路径 |
|---|---|---|
 |
 |
 |
- 然后再次
Win+R键输入cmd,输入xelatex -v,回车,便会发现安装成功。
1.1.3 安装 VScode
- 官网:https://code.visualstudio.com/
- 推荐安装稳定版
1.1.4 安装 VScode 插件
打开 VS Code → Extensions(扩展)界面,安装以下插件:
| 插件名 | 作用 |
|---|---|
| LaTeX Workshop | 核心 LaTeX 编辑插件,预览、编译、语法高亮 |
| Chinese (Simplified) | 中文界面(可选) |
| Code Spell Checker | 拼写检查(可选) |
1.2 配置 LaTex Workshop
-
快捷键
Ctrl+Shift+P打开搜索框,输入settings选择Open User Settings:
-
会打开一个
settings.json的配置文件,我们在花括号里面添加如下内容即可:

1 | //------------------------------LaTeX 配置---------------------------------- |
- 这里需要注意,我默认的编译链接是
xelatex -> biber -> xelatex*2,如果要更换,请更改settings.json中的如下配置:
1 | // 设置默认编译链接 |
- 如果更改为如下配置,表示使用上次的recipe编译组合:
1 | "latex-workshop.latex.recipe.default": "lastUsed", |
- 如果更改为如下配置,表示使用编译组合为
xelatex -> bibtex -> xelatex*2:
1 | "latex-workshop.latex.recipe.default": "xelatex -> bibtex -> xelatex*2" |
这里如果想要更深入了解 biber 和 bibtex 的区别,请前往第三章 biber VS bibtex
1.3 编译 .tex 文件
-
整体测试编译流程示意:
-
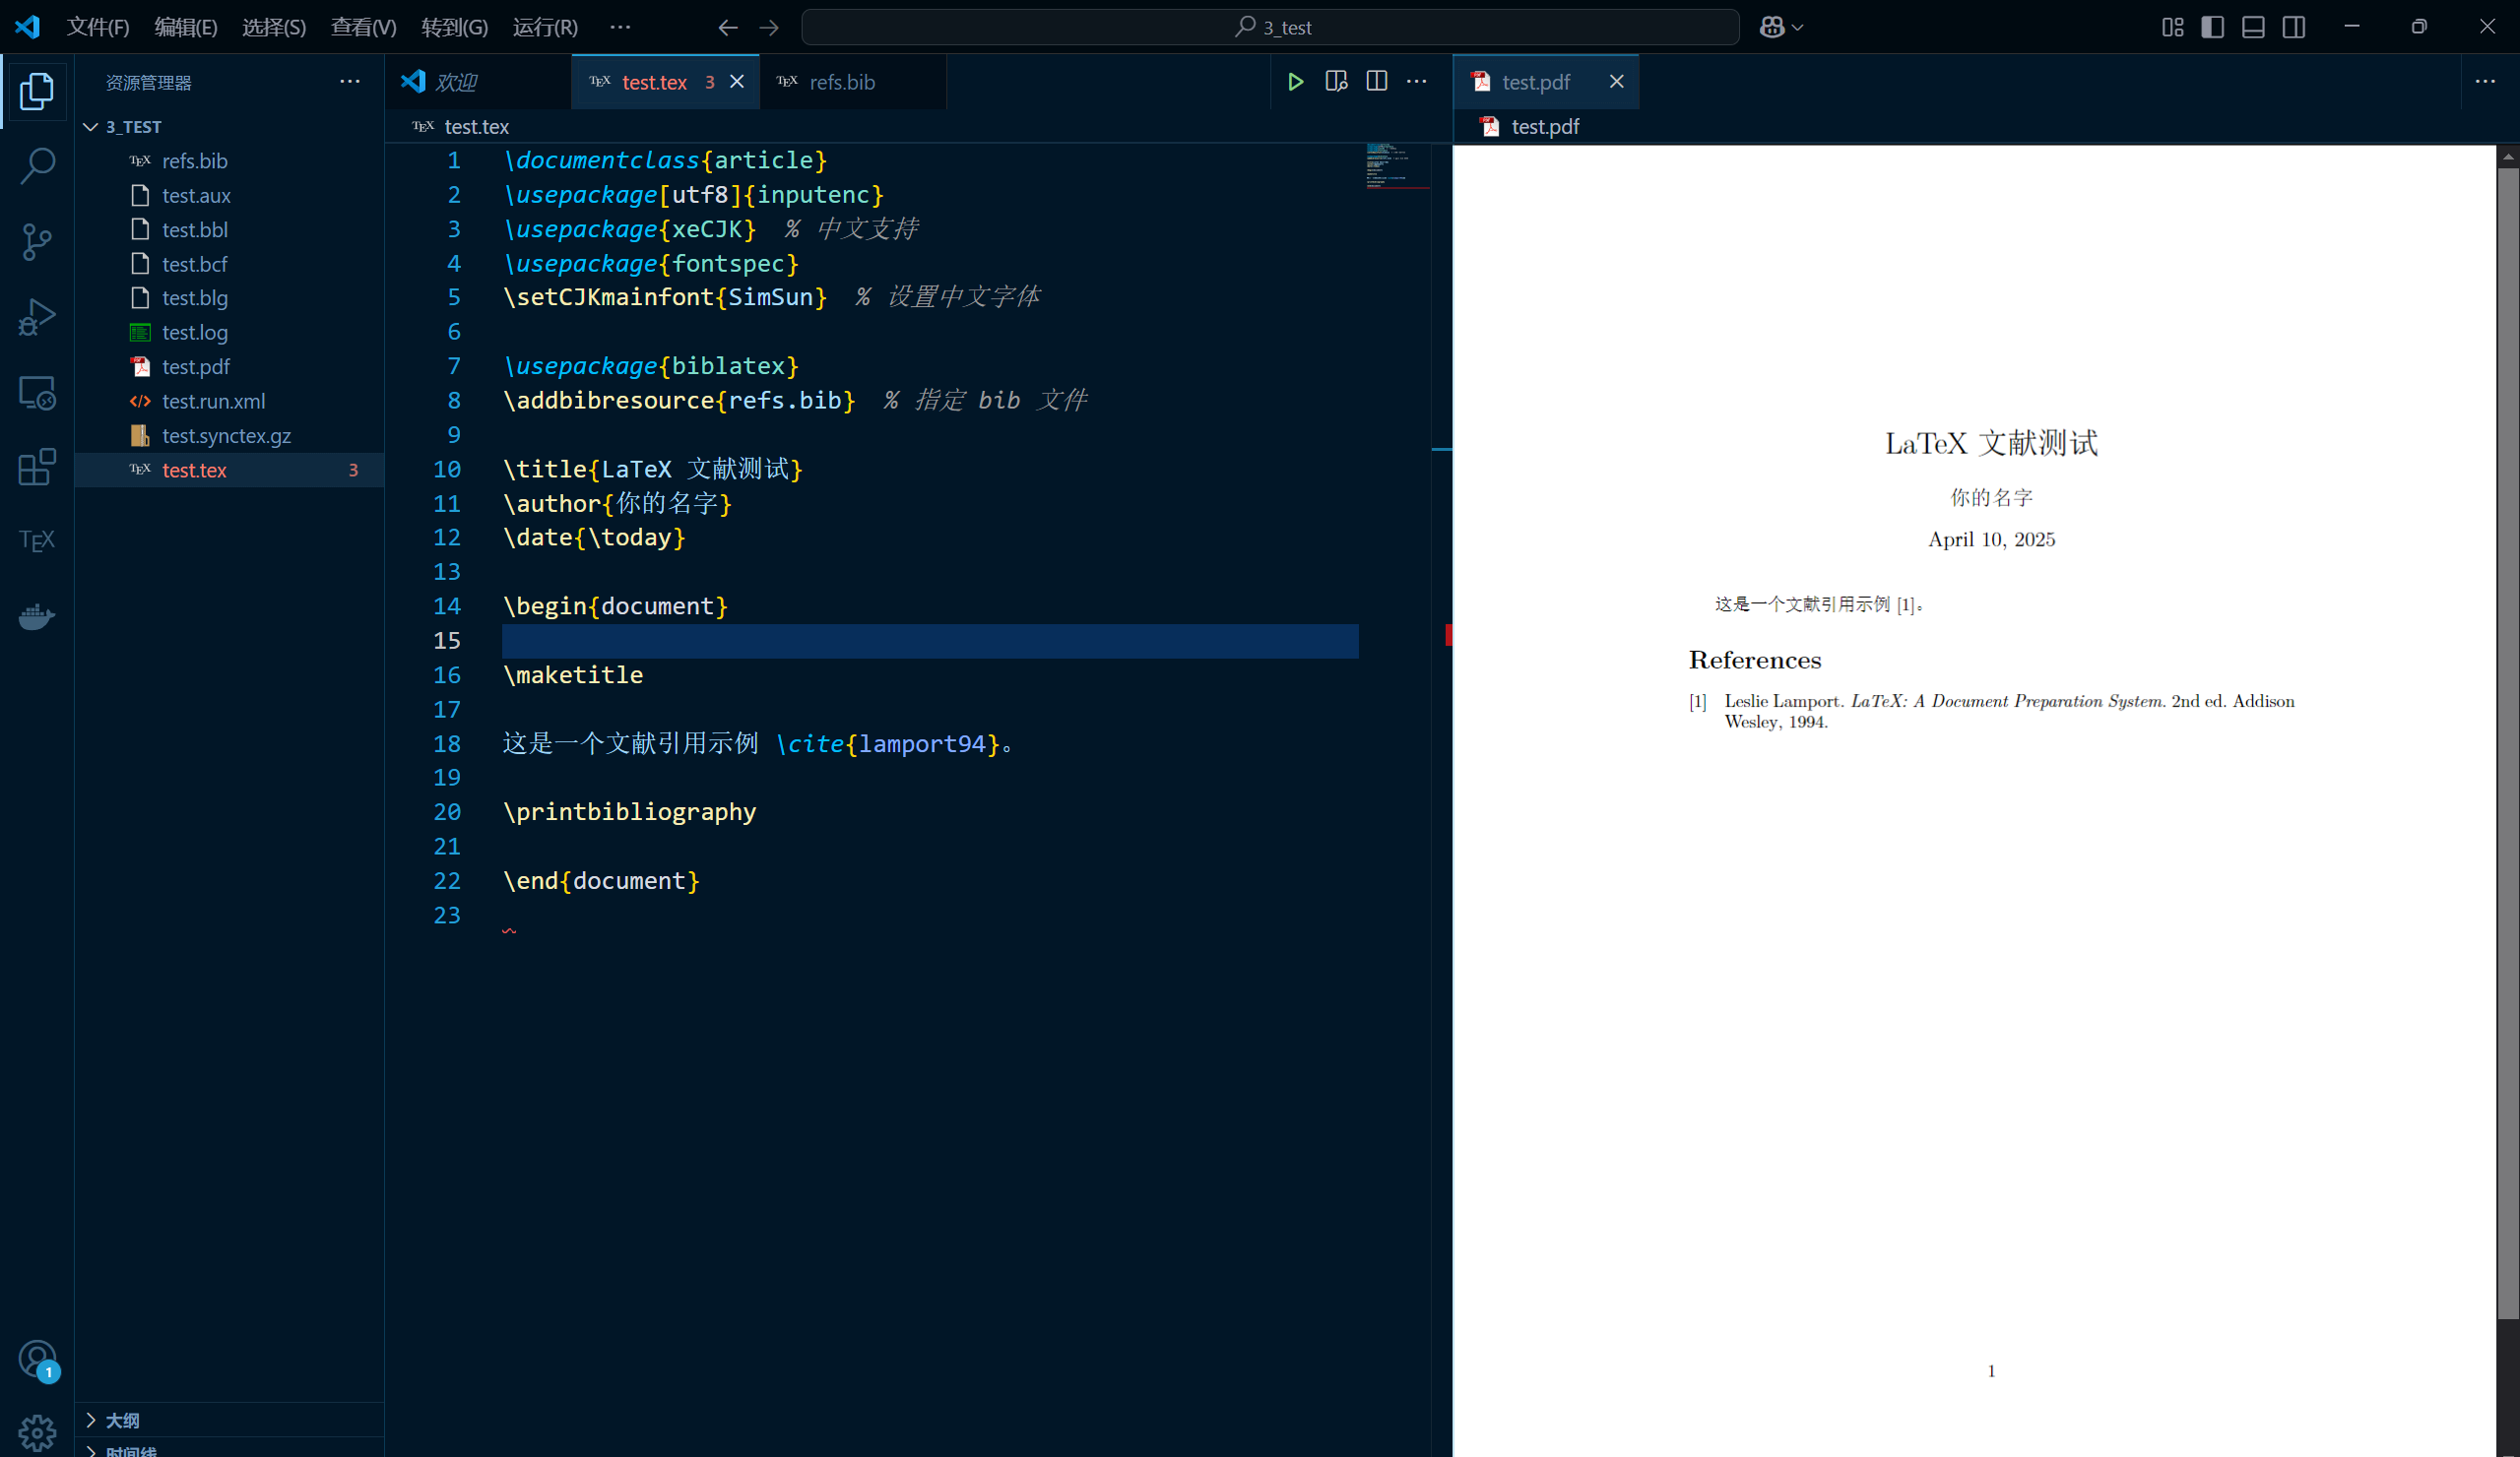
新建一个工作空间,打开后,在文件夹中新建一个
test.tex文件,内容如下:
1 | \documentclass{article} |
- 在文件夹中新建一个
refs.bib文件来保存参考文献内容,如下:
1 | @book{lamport94, |
- 直接选择编译即可,结果如下图:
2 双向跳转的快捷键
在 VScode 中,有双向跳转的快捷键,可以便于 PDF 预览与源码之间的互相跳转,内容定位。
-
由 PDF 源码:
Ctrl+鼠标左键双击即可快速定位到源码:
-
由源码 PDF:首先选中源码内容,使用快捷键
Ctrl+Shift+J即可快速定位到 PDF 预览中的对应位置:


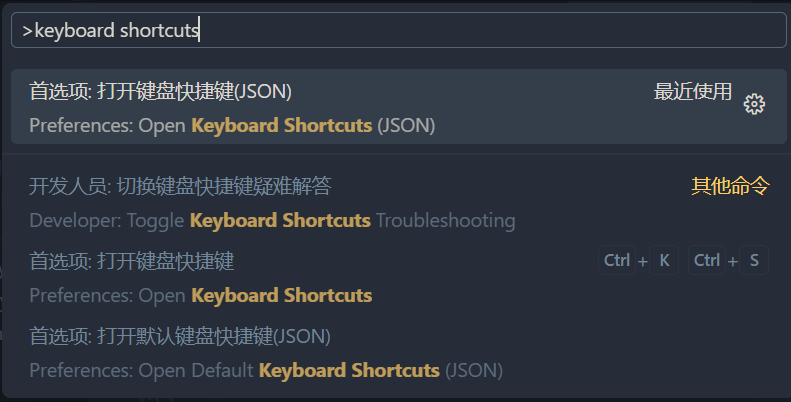
3 VScode 自定义快捷键配置
- 首先
Ctrl+Shift+P打开命令面板; - 输入
keyboard shortcuts打开键盘快捷键配置文件;
- 自定义快捷键,编辑
keybindings.json文件:
1 | // 将键绑定放在此文件中以覆盖默认值 |
- 测试即可。
4 常遇见的问题及解决
4.1 LaTex添加附录
-
问题描述:有时候我们会发现因为附录为了不加标题我们使用了
\section*{附录},会导致执行生成目录的语法\tableofcontents后,附录并未出现在目录中。 -
解决方法:我们需要在
\section*{附录}中一行命令,使得其被添加到目录中:1
2\section*{附录}
\addcontentsline{toc}{section}{附录}
4.2 设置行内代码等宽字体
-
问题描述:有时我们在写行内代码,比如 Python 中 for 循环的用途,这里面的
Python和for都是代码,用等宽字体比较好看。 -
解决方法:我们使用
\verb|内容|来设置等宽字体,具体显示对比效果如下:

4.3 图片显示位置与插入位置不符
-
问题描述:如下图所示,源代码是在
等多个维度后插入的,但是由于图片属性设置为[htbp],即浮动,因此在页面大小不够的时候,会自动移动到下一页,来保证页面填充完全:
-
问题解决:按照如下示例的格式修改即可:

1 | \usepackage{float} % ← 导言区添加了这个,OK! |
4.4 目录页数大于2时第1页目录没有页眉
- 问题描述:如下图所示,当目录页数大于2的时候,会发现只有第二页有页眉,第一页没有。
- 问题分析:目录第一页没有页眉,而目录第二页才开始显示页眉。这是因为
\tableofcontents默认会在目录首页自动插入\thispagestyle{plain},从而取消页眉。 - 问题解决:在目录页相关的
LaTex代码中添加:

1 | \fancypagestyle{plain}{ |